Here are some pictures of the front of the Hatch puzzle.
****Spoiler Warning**** If you have not seen all of season two, proceed with caution - there are some images from the finale.
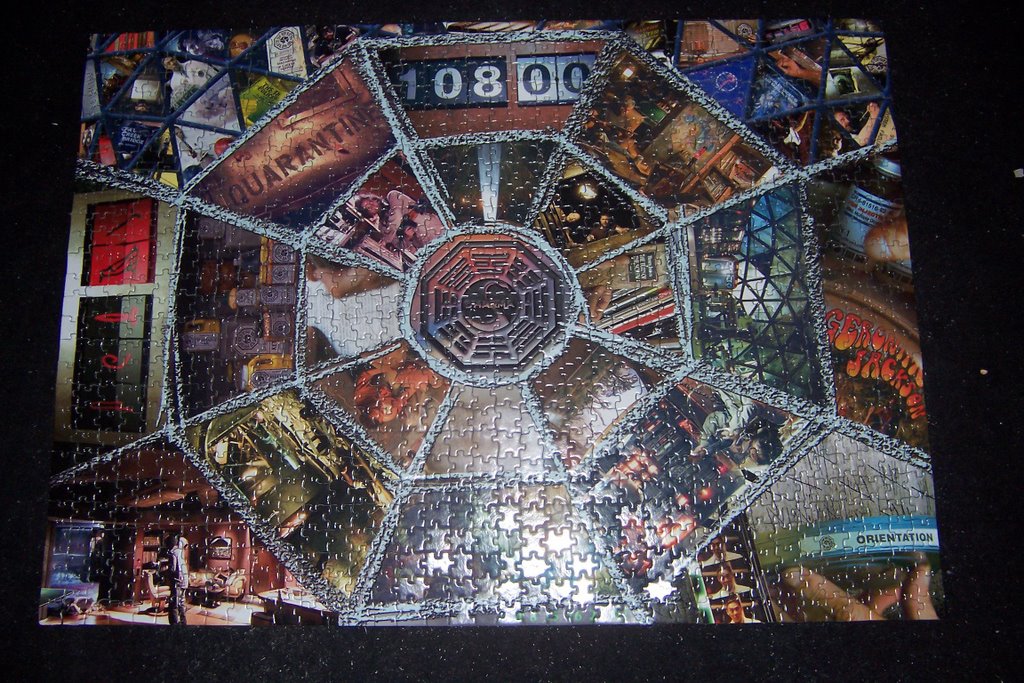 Here is the complete puzzle - sorry for the glare!
In case you can't tell, the images are (clockwise from top)
Inner Ring: Light shining up from hatch, Jack and Locke looking down the hatch after blowing it open, a hand holding Turn of the Screw, a painting of trees, a drawing of the execute button, Henry Gale leaning over Locke (when the blast door came down on his leg), a hand writing, Desmond with a gun
Outer Ring: the countdown clock, set to 108, Charlie looking at records, the computer room (someone is standing in the corner, but I can't make out who), Desmond pointing a gun at Locke (who is sitting at the computer), the mural, the hatch after the explosion (someone is laying on the floor - see below), DHARMA food, the Quarantine sign
Corners: See below for top corners
bottom left: Michael after shooting Libby and Ana Lucia
bottom right: the orientation film can
left side: the hieroglyphics on the timer
right side: a Geronimo Jackson record and the bottle of medicine that Desmond injected himself with
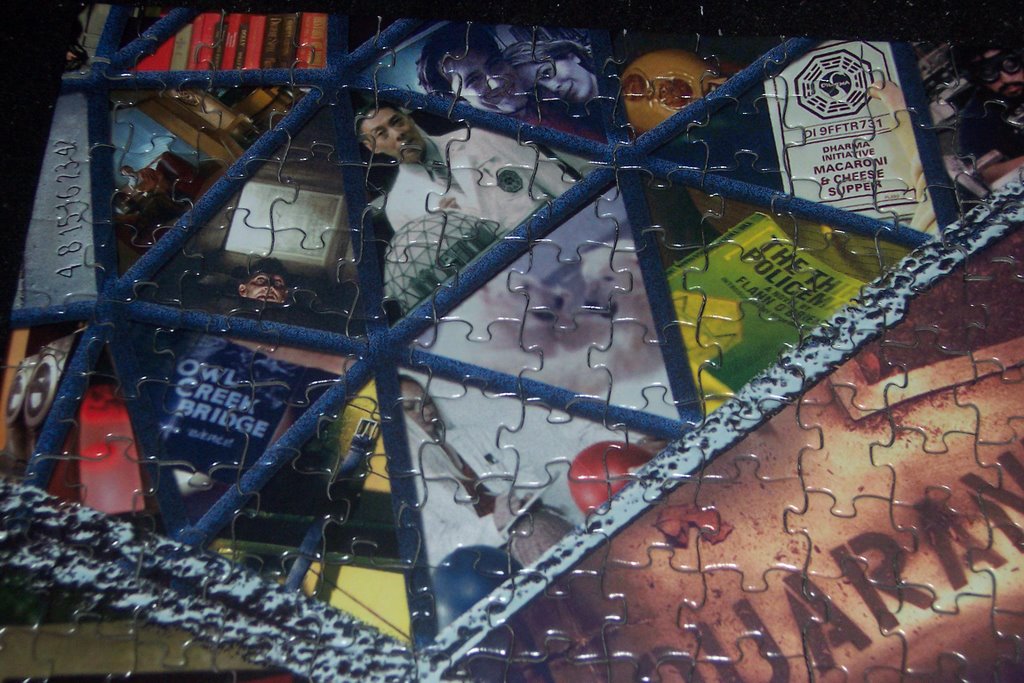 This is the top left corner, with images from the orientation film, Henry Gale in the vent, a box of DHARMA mac & cheese, the photo of Desmond and Penny, Charlie's belt stuck to the magnet and the books The Third Policeman and Incident at Owl Creek Bridge
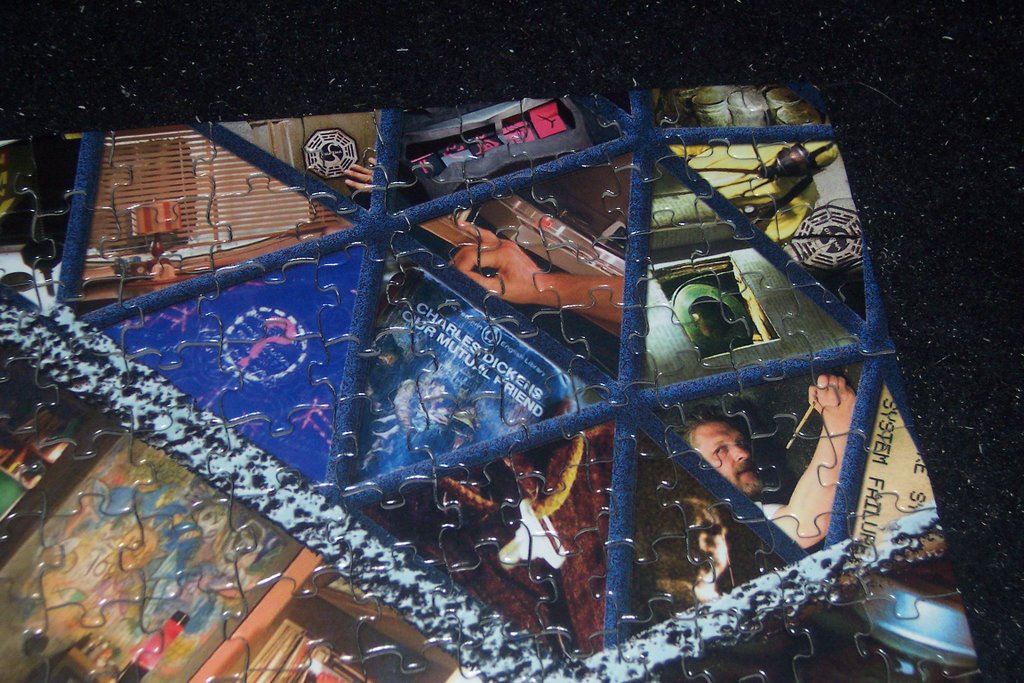 This is the top right corner, with images from the blast door map, Kelvin drawing, Alvar Hanso, Kelvin in his haz-mat suit, the book Our Mutal Friend, Jack's key going for the magnet and the hieroglyphics again.
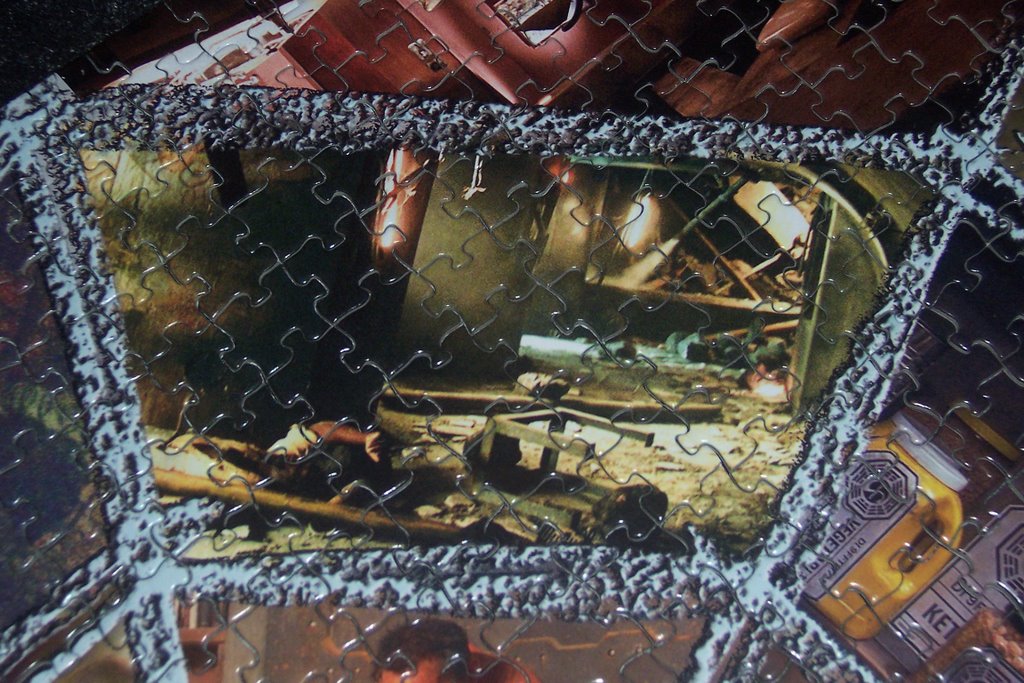 This is the picture of the hatch after the explosion. I can't tell who is laying on the floor, but I think it is Eko.
The back of the map showed images from the blast door map - specifically, the upper right corner featuring the Arrow Station.
posted by Melissa_Lossa at 6:54 AM
1 comments
![]()

